Wednesday, December 30, 2009

Food 4 Your Deers


Here is my first layout from Christmas 2009! This year, when he met Santa, Jacka told him, "We make some food for yo' deers." It was so funny. I had to scrap it in some way. It ended up being the perfect title for the pictures of us sprinkling the reindeer food on the lawn. This year Jacka took that job very seriously!

The title is a mix of a child's year, all mixed up, and gypsy font. The journaling block is gypsy wanderings and george.

I did a bit of recycling with this layout. I needed velum to back my pictures, but I did not have any. I did however have a velum bag from Archivers. I cut it to fit the spot I needed and it worked perfectly!

Monday, December 28, 2009

The Great Hamster Hunt


Well Christmas is over and the presents have all been opened. Santa was good to Jacka...maybe too good. Jacka wanted one present that I did not trust Santa with. The man in red is great and all, but he is a man...can a man be trusted with the hottest toy of the year?! That is debatable. I ran near and far looking for the Zhu Zhu Pets. It became a bit of a quest. It all started in August and finally ended just 3 short days before Christmas! Naturally I had to scrap it.


The title is zooballo and Mickey font. The hamster heads are animal kingdom. The papers, which I think are too cute, are from the open stock at Michael's. I went through their paper recently and was pleasantly surprised with all the options they had.

I think this is going to be a fun page to look back on when Jacka is an adult...and yes, that is me in my pajamas at Toysrus.

Thursday, December 24, 2009

Merry Christmas!

I want to wish a Very Merry Christmas to all! I have been very busy the last few days crafting the last few holiday gifts and making 10 pans of homemade cinnamon rolls...whew! I am tired. I will post pictures of my creations after they have been opened. Until then...

Jump In Bed And Cover Your Head, Cause Santa Claus Comes Tonight!

Sunday, December 20, 2009

Heartwarming Christmas Tale

I have the most heartwarming story to tell about Jacka. This morning we went to church as usual; ours is a very large church so there are many people we do not know. Afterward we were standing in the gathering lobby chatting with family when Jack spotted an older gentleman several feet away. This man had a long white beard and wavy white hair. He was wearing a red sweater vest and had a rather "Santa-like" figure.

I saw Jack looking at him so I stooped down to talk to him. Here is our conversation:

Me: Jacka who are you looking at?
Jacka: That man
M: He looks like Santa, doesn't he?
J: (With giant eyes) Yep, probably is!
M: Why is he here?
J: Probably make sure I be good

I then encouraged him to go tell the man Merry Christmas. He did so very bravely. He was very polite and the gentleman just beamed at him.

I wish I would have had my camera, it was truly a magical experience. The look in Jacka's eyes was just priceless. It has made my week and made me so excited to see Christmas Day arrive.

Friday, December 18, 2009

Toes in the water, Toes in the sand

Here is my latest creation featuring Jacka's first trip to the beach. He was fascinated with the waves and loved the sand. The title and the waves were both made with Life's A Beach. I was worried that the title would look too cluttered, but I am very pleased with the results!

I hope you have the oppotunity to put your toes in the water or the sand sometime soon!

Thursday, December 17, 2009

Lactose Intolerance...What Lactose Intolerance


The title of this page was inspired by the great 5x7 photo of Jacka on this layout. He just has a look of mischief in his eyes! During our 2007 trip to HHI one of our first stops was to The Frozen Moo for ice cream. Jacka is lactose intolerant, but I could not eat the good stuff in front of him. He got just a few bites...and he loved every single one! Lucky for us, he did not get sick.

This LO is Cricut heavy. I used a total of 5 carts here:
Zooballoo for the title
AMU for the subtitle
SYI for the ice cream
George for the arrow
Mickey font for the "Yum"

The edges of the card stock are inked with basic white ink and I used two Martha Stewart punches, drippy goo and rings, to accent the photos.

I hope you enjoyed this layout...and even though it is cold...have some ice cream today!

Monday, December 14, 2009

Not a Creature was stirring...


Here is my latest layout, created for the challenge on the DIS. (Love ya girls!) This photo is from Jacka's first Christmas. He slept through the entire night on Christmas Eve...he must have known Santa was on his way!

I used storybook for the title. The journaling circle is also storybook; I used a hole punch to add the holes in each of the scallops. The snowflakes are from A Child's Year. It might be hard to see in the photo below, but each of the snowflakes are accented with tiny seed beads. They added the perfect touch of bling that the snowflakes needed.

Saturday, December 12, 2009

First Snow


We had had our first couple of snows already! They have just been dustings, but I am loving it. While I totally agree with Kenny that all I want for Christmas is a tan, I love my snow too. (Kind of a contradiction huh?!)

Anyway here is Jacka enjoying the first snow of the season. They were huge fat flakes that were great for photographing! He was in such a rush to get outside that he put rain boots on instead of snow boots!


For this page, the title is Mickey font. The snowflake is from CM, that I borrowed from a friend. I love how that turned out with the glitter mat stack! I normally do not get may CM products, but I might have to buy that one. Finally, the silver journaling added just the right icy touch.

Thanks for looking...and happy first snows!

Turkey 2009


Here is the finished product with Jacka's turkey project. I love how it turned out! The title was actually a mistake. I cut the shadow, but when I cut the top layer I must have had my dimensions wrong because they came out really small. I decided to layer them anyway and I am very pleased with the effect.


Thursday, December 10, 2009

My first HHI page


Here is the first page from my 2007 Hilton Head Island scrapbook. It definitely warms my heart a little to look at these pictures. DS was so little, yet he still has many of the same facial expressions and mannerisms.

There is a great little toy store in Sea Pines called Habortown Toys. Jacka really enjoyed their rocking boat. So, of course I had to scrap it! When I first laid this page out I had a different blue for the background since this shade does not exactly match. However when I laid this one beside the picture, it made DS's eyes pop. It just grew out his beautiful blue eyes.
(Yikes! Sorry for the icky picture quality...)


For the page I used:
Mickey Font and A Child's Year for the title (Boy was it a challenge to cut those white letters so small!)
Life's A Beach for the boat tag
All Boy mat stacks

I am so excited to get started on this album. It is refreshing to work on these beachy photos when there is snow on the ground outside!

Wednesday, December 9, 2009

Pocket Page!


I know that it is not everyone's style, but I love to include found objects into my scrapbooks. I save everything...ticket stubs, key cards, even the wrapper (that was totally clean) from my Mickey Bar. So naturally I had to include the maps from the WDW parks.

I created this pocket page so that the maps could be taken out and then returned with ease; and it was so easy to do! I cut the patterned page from corner to corner and glued it into place. Mickey Font was perfect for the title. I accented the page with some ribbon and created a bow for the middle. Enjoy!


Tuesday, December 8, 2009

It's The Chicken Man!

I shop early, I like to get bargains and get exactly what I want. Because of this, Jacka picked a Halloween costume about 2 months in advance. He decided that he was going to be a paleontologist riding a dinosaur. I found a great costume and all was well. Then 3 days before the big day Jacka decided that a chicken was more his style. Yikes! I was in a bit of a panic, until I remembered that we had a great chicken costume in our dress-up stash. Because I am scientifically minded I wanted to add my own spin on it, so I used my gypsy and Mickey font to create a sash that said "Pox"...and there you have it, Jacka was Chicken Pox for Halloween. His costume went over very well and he even won a contest at our local library.


Above is my simple layout of him in costume. The title is Mickey Font and Gypsy Font. The chickens are from Animal Kingdom. I brought the chickens to life by layering them in color and adding wiggle eyes. The feathers make Jacka's costume pop and the photo border is the Martha Stewart Punch Around the Page in Rings (http://www.marthastewartcrafts.com/index.php?v=msc_prod_tool_punches). These punches can be a little tricky at first, but Martha offers her tips and tricks here... http://www.marthastewart.com/article/tips-for-our-punch-around-the-page-products

Here is an up close view of the chickens...I love how they came out!


Wednesday, December 2, 2009

Instructions for the explosion card

I pulled these instructions from the video at the link posted in the previous post. They are very rough, but if you use them in conjunction with the video they will make more sense.

Supplies:
1~4x12 plain card stock
3~3 5/8x3 5/8 designer paper
1~2 5/8x2 5/8 designer paper
Embellishments

1. Cut 1 of the 3 5/8 pieces into 8 equal sized triangles. This works best if you line them up point to point on your cutting board.

2. Cut a second 3 5/8 piece into half and then half again. You should end with 2 equal sized triangles.

3. Cut the final 3 5/8 piece at 1 3/4 on your cutting board and then again at 1 3/4 so that you have 2 rectangles.

4. Working with the large card stock piece, score it at 6in and then at 2in on each end.

5. Next take the upper corner and fold it over to where the 6in score is. (Use a bone folder to run along this fold so that it is more crisp.)

6. Repeat previous instruction on other side.

7. Turn the page upside down (so that what was your top is now your bottom) and repeat step 5 to each side of the card stock.

8. Open the folds and flip the paper over. Squish the triangles you just made to make a peak fold.

9. The center triangle should now be over the peaks. Fold the paper forward at the 2 in scores, so that the rectangles are visible.

10. Attach the designer paper pieces and the embellishments. Enjoy!

First Time Posting A Card

My nephew's birthday was yesterday (I cannot believe he is 5 already!) so I decided to make him a Cars card to match his Cars themed gift. I am new to card making I only have 3 under my belt, so I wanted something simple that still had the wow factor. I found these great instructions for making an explosion card by Dawn...http://www.youtube.com/watch?v=Z1dr17_xWas. I followed her instructions but made the card my own.

Opened View


Closed View

I used plain red card stock, two pieces of patterned paper from a Boys to Men stack, and a piece of grey card stock that I put tire tracks on by painting the wheels of one of Jacka's cars and running it over the paper. Mickey font from Cricut made the perfect lettering and I finished it off with a couple of stickers from a Cars sticker pack. I hope he enjoys it!

Tuesday, December 1, 2009

Kid's Crafts on Cardstock...why didn't I think of this earlier?!


I love to document Jacka's growth with hand print or footprint crafts. We have a million of them...butterflies, spiders, apples, Santas, angels, ghosts, and turkeys! They all spend some time on the fridge and then end up in my keepsake tub. I have taken pictures of projects and cut some projects down to be mounted into Jacka's scrapbook, but I always struggle with the best way to do this.

Fast forward to last Tuesday...it was hand print/ footprint turkey day at our house. I decided to try creating the prints on 12x12 card stock. I do not know why I did not think of this sooner! Not only was the extra thickness nice to soak up the extra paint, but the larger size (versus regular 8.5x11 paper) made accommodating Jacka's large hands and feet much easier. The best part...the final product could easily be slipped into a scrapbook with not additional cropping! I am going to do this will all of the art projects I know I will want to keep from now on.

Check back in a few days to see the finished turkey page with accents, a title, and photo!

Happy Belated Turkey Day!

Happy Thanksgiving to one and all! Hosting Thanksgiving at my house and having a busy preschooler meant no blog updates. However, now that the turkey is almost gone, the crumbs are swept up, and the Black Friday shopping is done I am back.

I wish you all a festive and fun holiday season!

Tuesday, November 24, 2009

Our First Jacka-ism

Ah...my dear Jacka. He is so funny and such a good kid. However last night we had our first experience with what I hope does not turn into a potty mouth. Jacka was playing with legos. He was playing independently and I was keeping half an eye on him. He was getting frustrated because his bricks of choice we not sticking together. I decided to stay out of the situation to give him the opportunity to problem solve on his own. I heard him whine a minute and then out it came...Damn it! In his perfect little 3 year old voice. I had to turn my head to hide the laughter. Even though I knew exactly what he said I asked him to repeat it. He looked at the ground, then stuffed his blanket in his mouth as he repeated it. We talked about how there were other ways to express anger and that bad words did not help. He apologized and it was over as quickly as it had started, but it was quite funny! If my memory serves me correctly I remember cussing about legos too...only mine was in regards to getting them apart, not together. :o D

Monday, November 23, 2009

Eyeing A Friend

Happy Monday! I hope you all had a great weekend...I did, I was scrapping! Hence the lack of posts. :o ) I managed to get 3 pages done today (I love kids who nap well!). Here is my favorite of the day...

This page is the page that almost wasn't. These pictures have been printed for months and they have just sat in my picture envelope. I was not sure how to scrap them or what I wanted to focus on so there they sat. Tonight as I sat in shock after scrapping all of the pictures from our 2008 Disney trip (!) my eyes fell on these photos. I had to include them...so I fiddled for a bit and whipped this up.


The Mike head was cut with George, the mouth is the crescent shape trimmed down with hand drawn teeth added. The title is Gypsy font. I threaded the ribbon and created the twisted knot for detail. EK Success stickers added the perfect finishing touch.

Friday, November 20, 2009

I'm in stitches!

I love the look of hand stitching in my layouts! I think it adds such interesting visual and tactile appeal. However I am a frugal scrapbooker. I am sure there are all sorts of fancy tools to create this but for me a needle, some thread, a heavy spoon and a corn holder is all it takes!


Here are the supplies:


The first step is to sketch out what you want to stitch. If you have a Cricut and the pens, you can use that to sketch something for you. (My demo is on notebook paper.)


After you sketch use the corn holder to pierce the paper. The spoon makes a great mallet! (Make sure that you work on a protected surface.) Doing this step makes it much easier to stitch in the end. I have been told this is a very hillbilly way to scrap! lol


Now you are ready to stitch! You can use thread or embroidery floss. For a bold look, use all the threads together. For a more delicate look separate them. Just use a simple up and down motion going through your punched holes.


When you reach the end, tie off the thread on the back of your page (use a little tape to tape of the end to hold in place) and you are done! If you want a full line instead of a segmented one simply reverse your stitches. Go back along the same holes that you just passed through in the opposite direction (if you came up a hole, this time go down it.) This creates a full, solid line.


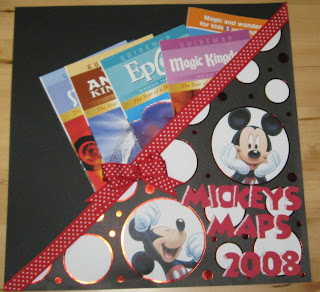
That is it! Simple, and such a nice touch. You can stitch as much or as little on a layout as you like. Here are some examples from my previous pages...

Here the small X stitches look like they are holding the photos in place and add visual detail.


This page was created for a challenge. You had to piece together lots of papers to resemble a quilt. The stitching reinforces that connection.


Finally the vines on this page could not have been created any other way.


I wish you lots of time to scrap this weekend...and get to stitching!

Thursday, November 19, 2009

Por Favor...

The WDW monorail is a family favorite around here. I could not wait to scrap this page. I hand pieced the monorail based on an old 1970s Disney advertising poster. Jacka's co-pilot's licence and those famous words finish out the page.
Photobucket

How Cute is this?!

How cute is this image?! I was out and about a few weeks ago and saw a very pregnant woman in the scrapping section of Target. This image was gracing her belly. I love it! Where was this when I was preggo with Jacka?! Oh well...maybe I can work this quote into his baby album somewhere. :)

Wednesday, November 18, 2009

One More...

One more layout for today...This page was a challenge. It sat on my scrap table for a long time. I wanted to scrap it because it is such a good look at what a Disney trip is with my husband and me (we are hard core Disney Fans!)...and what it does to those who go with us. My mother-in-law was exhausted by the time this photo was snapped!

The paper and sticker pack are vintage Disney and have been in my stash for about 5 years! I am so glad I finally got to use them. The title is Mickey font, Opposites Attract, and Storybook. I loved the mixed up effect of the word "Dazed".

Looking at this picture makes me tired...Goodnight for now!


Layout Number 2-Monkey Man

Jacka is my little Money Man. He cannot turn down a banana. Here he is enjoying breakfast in bed in WDW.

I had so much fun with this page because there are so many fun elements. The title is Mickey Font and Opposites attract from Cricut. The bananas are the half moon shape from the George cart that I altered. Notice the accent strips? One of them is a scan of DS's lovey blanket. I put the blanket on the scanner and created an image of it. I loved adding in that little touch.


The monkey boy was created with Paper Doll Dress Up. I cut the clothing pieces from Mulberry paper (if you do this set your pressure very low or the paper will rip). I then moistened the edges and frayed them using the "dental pick" tool from my Cricut tool kit. It was sort of an altered tear bear technique. (Here are the original instructions: http://thebearyscrap.com/pages/tearbear.htm) The body of the outfit is the super hero clothing. The tail is the kitty cat tail and the hat is the mouse hat that I repositioned the ears on. Chalk gave the cheeks and ears the perfect blush.

Now anyone feel like a banana?!

New Layouts!!!

In honor of the theme of the blog, here is the First Layout...Jacka with Kermit! These photos were not the best, but I wanted to scrap this giant friend. I thought this design drew more attention to the theme and less on the not so great photos.


The title was created with Mickey Font and Gypsy Font with the Cricut. I used a MS marker to ink the edges and give it some flair.


The tag is from Gypsy Wanderings and the Kermit is a sticker pack. Thanks for looking!


Welcome!!!

Welcome to my little corner of the net! Are you enjoying the playlist?! This blog is a place for me to display all of my crafting projects...and sprinkle in some humor from Jacka, my son.

I hope to eventually have theme weeks and host challenges, but for now I am just learning the blogging basics! :) There are two items of note that I must point out before moving on...

#1 on the playlist...I know that Let It Be is sung by The Beatles, not The Beattles...but there is that whole not putting their music on playlists issue.

#2 Why the frogs and do you know the title of this blog is misspelled?! The title is a play on words. I hope this blog becomes totally me, a snapshot of who I am through what I create. I had to add the frogs because they are me. I love amphibians and some very special people in my life have either shared that love with me or contributed to my collection. I had to bring them into the blog. The theme will eventually change, but for now enjoy the frogs in this girl's pocket (not boy's like the background says).

The first layout is coming soon!...